How to Fix Cross-Threaded Bolts and Nuts: A Step-by-Step Guide
By WhatSizeBolt TeamEdited 7 min read
Cross-threading is one of the most common — and most preventable — fastener mistakes. It happens when a bolt is inserted at an angle or with mismatched threads, causing the threads to cut into each other instead of meshing properly.
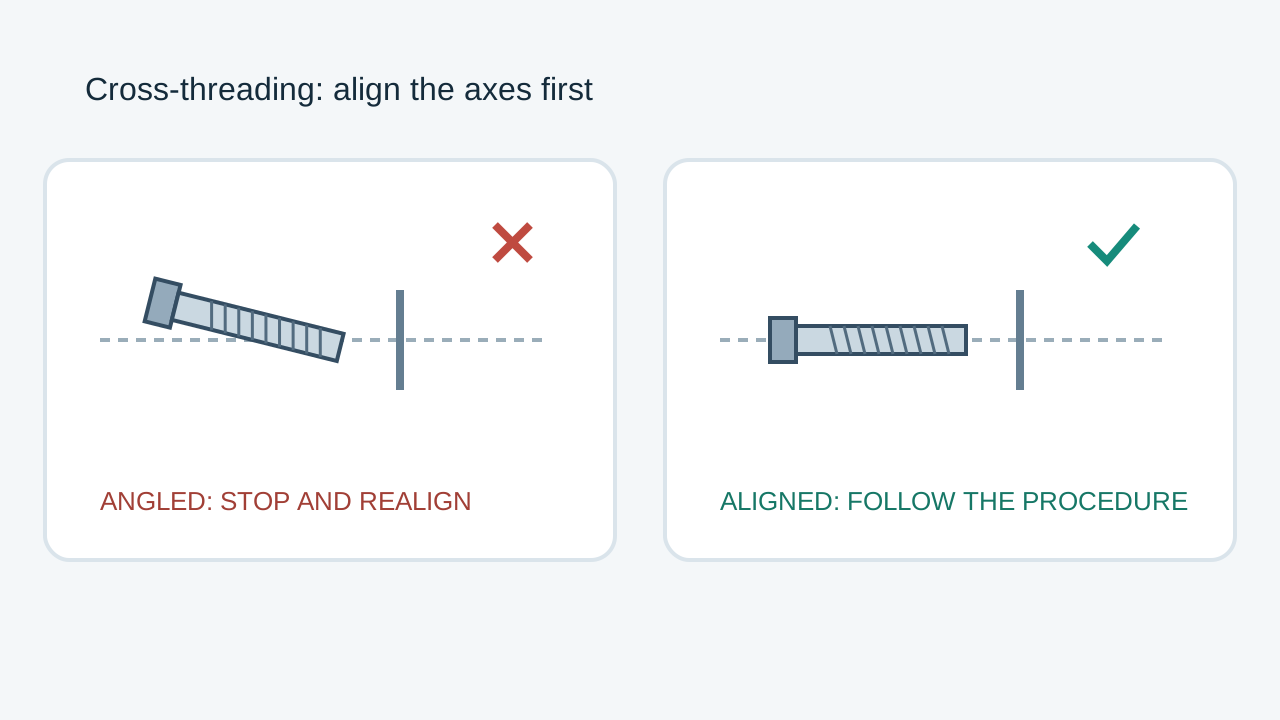
Schematic illustration, not a grade identification, dimensioned drawing or application-specific procedure. Follow the exact product and vehicle instructions.
Overview
Cross-threading is one of the most common — and most preventable — fastener mistakes. It happens when a bolt is inserted at an angle or with mismatched threads, causing the threads to cut into each other instead of meshing properly. The result: damaged threads, stripped bolts, and potentially expensive repairs. This guide explains how to identify, fix, and prevent cross-threading.
What Is Cross-Threading?
Cross-threading occurs when the internal and external threads of a fastener don't align properly. Instead of engaging smoothly, the threads grind against each other at an angle, cutting new grooves into both the bolt and the receiving hole.
What It Looks Like
- Resistance immediately when starting to thread a bolt (should start smoothly by hand)
- Bolt wobbles or feels "off" as you turn it
- Squealing or grinding sound during threading
- Threaded hole feels rough after removal
- Bolt won't tighten properly — it's either loose or won't go all the way in
Why It Matters
- Weakens the joint: Cross-threaded bolts have reduced clamping force
- Causes leaks: In fluid-sealing applications (oil pans, water pumps), cross-threading destroys the seal
- Leads to bolt failure: A cross-threaded bolt under load can snap
- Damages expensive parts: Repairing a cross-threaded engine block or cylinder head can cost hundreds of dollars
Common Causes of Cross-Threading
- Starting at an angle: The most common cause — rushing the start of threading
- Wrong bolt for the hole: Using SAE bolts in metric holes (or vice versa)
- Dirty or damaged threads: Debris in the hole or damaged bolt threads
- Using power tools too aggressively: Impact wrenches or drills starting bolts without alignment
- Forcing a stuck bolt: If a bolt resists, stop — don't force it
- Worn or rounded threads: Old bolts and corroded holes are more susceptible
- Blind holes: Can't see the bolt entering, making alignment difficult
How to Remove a Cross-Threaded Bolt
Step 1: Stop Immediately
The moment you feel resistance at the start of threading, stop turning. The earlier you catch it, the less damage occurs.
Step 2: Back Out Slowly
Turn the bolt counterclockwise very slowly. If the threads are only slightly cross-threaded, you may be able to back it out cleanly.
Step 3: Inspect Both Parts
- Bolt: Look at the threads. Are they cut, gouged, or deformed?
- Hole: Shine a light into the hole. Look for new scratches, metal shavings, or deformed threads.
Step 4: Try Again (If Damaged Is Minimal)
If both the bolt and hole look okay after backing out:
- Clean both thoroughly — remove any metal filings
- Start completely fresh — align the bolt perfectly perpendicular to the hole
- Thread by hand for at least the first few turns
- If it catches, you're good. If it resists again, stop — the threads may be too damaged.
Step 5: If the Thread Is Damaged
See the repair methods below.
How to Fix a Damaged (Cross-Threaded) Hole
Method 1: Thread Chasing (Minor Damage)
Best for: Slightly damaged threads where most of the thread profile still exists
Tools: Thread chaser (NOT a tap — a chaser follows existing threads, a tap cuts new ones)
Steps:
- Select the correct thread chaser for your thread size and pitch
- Insert the chaser straight into the hole
- Turn clockwise with gentle pressure
- Back out occasionally to clear chips
- The chaser re-cuts the damaged threads back to their original profile
Why a chaser, not a tap: A tap removes material and can enlarge the hole. A chaser follows the existing thread path and repairs it without changing the size.
Method 2: Tap and Die Repair (Moderate Damage)
Best for: More significant damage where threads need to be fully re-cut
Tools: Correct tap for your thread size + tap wrench + cutting oil
Steps:
- Clean the hole of all debris
- Apply cutting oil to the tap
- Start the tap by hand, turning clockwise
- Go slowly — quarter turns forward, half-turn back to clear chips
- Continue until the tap goes through (or to the required depth for a blind hole)
- Test fit a bolt — it should thread smoothly by hand
⚠️ Warning: Tapping can enlarge the hole. If the existing threads are severely damaged, you may need an oversized bolt or a thread repair insert.
Method 3: Thread Inserts (Heli-Coil, Time-Sert, etc.)
Best for: Severely damaged threads or when the hole has been enlarged
Heli-Coil Installation:
- Drill out the damaged threads to the specified drill size
- Tap the hole with the Heli-Coil tap (larger than the original tap size)
- Screw in the Heli-Coil insert using the installation tool
- Break off the tang at the bottom
- The hole is now restored to the original thread size and strength
Time-Sert Installation:
- Similar to Heli-Coil but uses a different installation tool
- Better for blind holes (no tang to break off)
- More expensive but easier to install in tight locations
When to Use Thread Inserts:
- Engine blocks: Cylinder head bolt holes, water plug holes
- Transmission cases: Shift shaft and drain plug holes
- Aluminum components: Where original threads are stripped from overtightening
- Anywhere you need to restore full thread integrity
Method 4: Oversize Bolt (Last Resort)
When to use: When the hole is damaged but you can't use a thread insert
Steps:
- Tap the hole to the next standard oversize
- Use a bolt one size larger
- Note: This may require slightly larger washers or modified clearances
Downside: Not always possible due to space constraints. Oversize bolts may not match the original strength specification.
How to Prevent Cross-Threading
The Golden Rule: Start by Hand
This is the single most effective prevention method. Always start bolts and nuts by hand for at least the first 2-3 full threads.
Prevention Checklist
- Align perpendicular: Make sure the bolt is perfectly straight before starting
- Feel for engagement: You should feel smooth, even resistance. If it's gritty or catches, back out and restart
- Use the correct fastener: SAE bolts in SAE holes, metric in metric — never mix
- Clean threads: Remove dirt, old sealant, and debris before assembly
- Check bolt condition: Don't use bolts with bent, nicked, or corroded threads
- Avoid power tools for starting: Never use an impact wrench or drill to start a bolt into a threaded hole
- Lubricate as specified: Proper lubrication helps threads engage smoothly
- Use a chamfer tool: On blind holes, a chamfer (bevel) on the hole entrance helps guide the bolt in
For Blind Holes (Where You Can't See the Thread Start)
- Use a magnetic stud holder or similar tool to start the bolt
- Tap the bolt head with a small hammer as you turn — this helps the threads find their way
- Use a bolt with a chamfered (beveled) end if available
- Consider a thread guide — a tool that slides into the hole and guides the bolt
Cross-Threading in Specific Applications
Engine Components
- Head bolts: Always start by hand, lubricate as specified, and follow the correct torque sequence
- Oil pan bolts: Common cross-thread location — take extra time to align
- Exhaust manifold bolts: Heat makes threads more vulnerable — never force
Brakes
- Caliper bolts: Extremely critical — a cross-threaded caliper bolt can prevent proper braking
- Brake bleeder valves: Small and easy to cross-thread — always start by hand
Suspension
- Ball joint nuts: Often cross-threaded during replacement — use extreme care
- Sway bar links: Common cross-thread location when tools slip
Wheels
- Lug bolts (European vehicles): Easy to cross-thread — align carefully
- Lug nuts: Less common but possible — especially with cross-threaded wheel studs
Cost of Neglecting Cross-Threaded Bolts
| Scenario | Potential Cost |
|---|---|
| Cross-threaded oil drain plug | $200-$1,000 (oil pan replacement) |
| Cross-threaded head bolt | $1,000-$3,000 (engine block repair) |
| Cross-threaded brake caliper bolt | $500-$2,000 (caliper and rotor damage) |
| Cross-threaded transmission drain plug | $500-$1,500 (transmission repair) |
| Cross-threaded wheel lug nut/bolt | Risk of wheel loss — potentially fatal |
Prevention is almost always cheaper than repair. Take the extra 30 seconds to start bolts by hand.
Related Articles
- How to Identify Bolt Grades and Strength
- How to Remove a Broken Bolt Without Wrecking the Thread
- Understanding Torque Specifications
- Fastener Material Selection Guide
Tools for fixing threads you’ve already damaged
Two different repairs: chase threads that are merely deformed, or replace the threads entirely when the hole is stripped.
Some links below are Amazon affiliate links — as an Amazon Associate we may earn a small commission at no extra cost to you.
Tap and die set (SAE + metric)
Running the correct tap or die through damaged threads recuts them to the original form. Match the tap to the thread you measured — a tap one pitch off will finish the job of destroying the hole.
Thread repair (helicoil) kit
Drills the ruined hole oversize and installs a steel insert at the original thread size, which is stronger than the aluminium it replaced. This is the fix when a tap just spins.