How to Use a Torque Wrench: Click, Beam & Digital (the Right Way)
By WhatSizeBoltEdited 11 min read
Most people quietly defeat their torque wrench - choked-up grip, double clicks, stored wound up. The technique that makes the number mean something, for all three types.
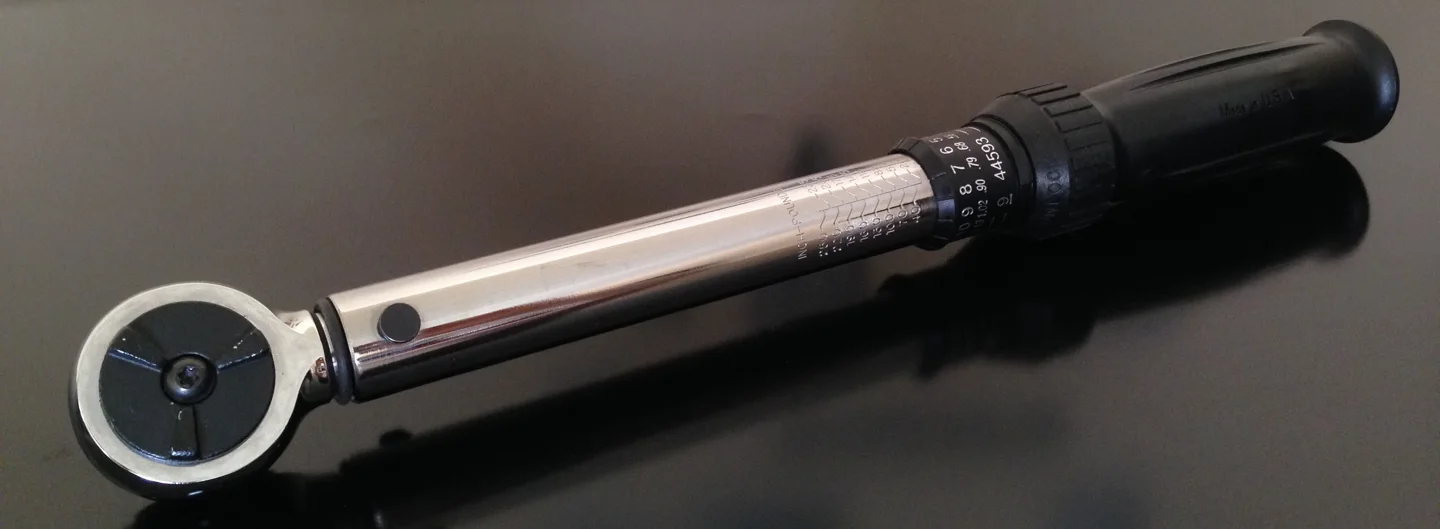
A 3/8-inch-drive inch-pound click wrench: drive size does not determine units or rated range. No calibration or vehicle specification is implied.
Photo: Typhoon at English Wikipedia (J.C. Fields) · CC BY-SA 3.0 · Resized without cropping for the article hero.
A torque wrench is the one tool in the box that measures instead of just turning — and most people quietly defeat it: hand choked up on the shaft, three extra clicks “to be sure,” stored cranked to 100 ft-lb since March. Here’s the technique that makes the number on the handle mean something, for all three types.

The technique, any type
- Look up the real spec first. Not “good and tight” — the number, from your service manual or our database. Note the units.
- Hold the handle on the grip mark. The wrench is calibrated for force applied there. Choking up or gripping the shaft changes the effective lever arm — and the torque you actually deliver.
- Pull at 90°, slow and smooth. Jerking the handle spikes past the target before the mechanism can tell you. One steady pull through the spec.
- Thread and seat the fastener by hand first. The torque wrench does the last, measured stretch — it is not a speed tool.
Click type (the one most people own)
- Unlock the collar and twist the handle until the scale reads your spec.
- Lock the collar. An unlocked handle can drift as you pull.
- One slow pull until you feel and hear the single click.
- Stop. That click was the measurement. Keep pulling and you are now torquing past spec, blind.
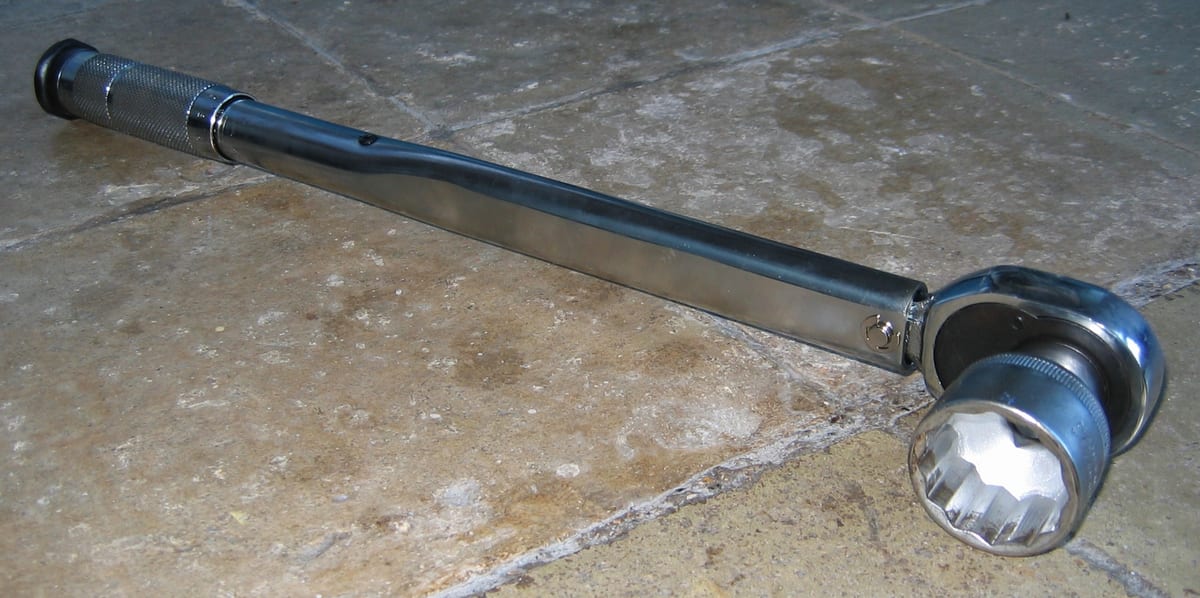
Beam type (simplest, and honest)
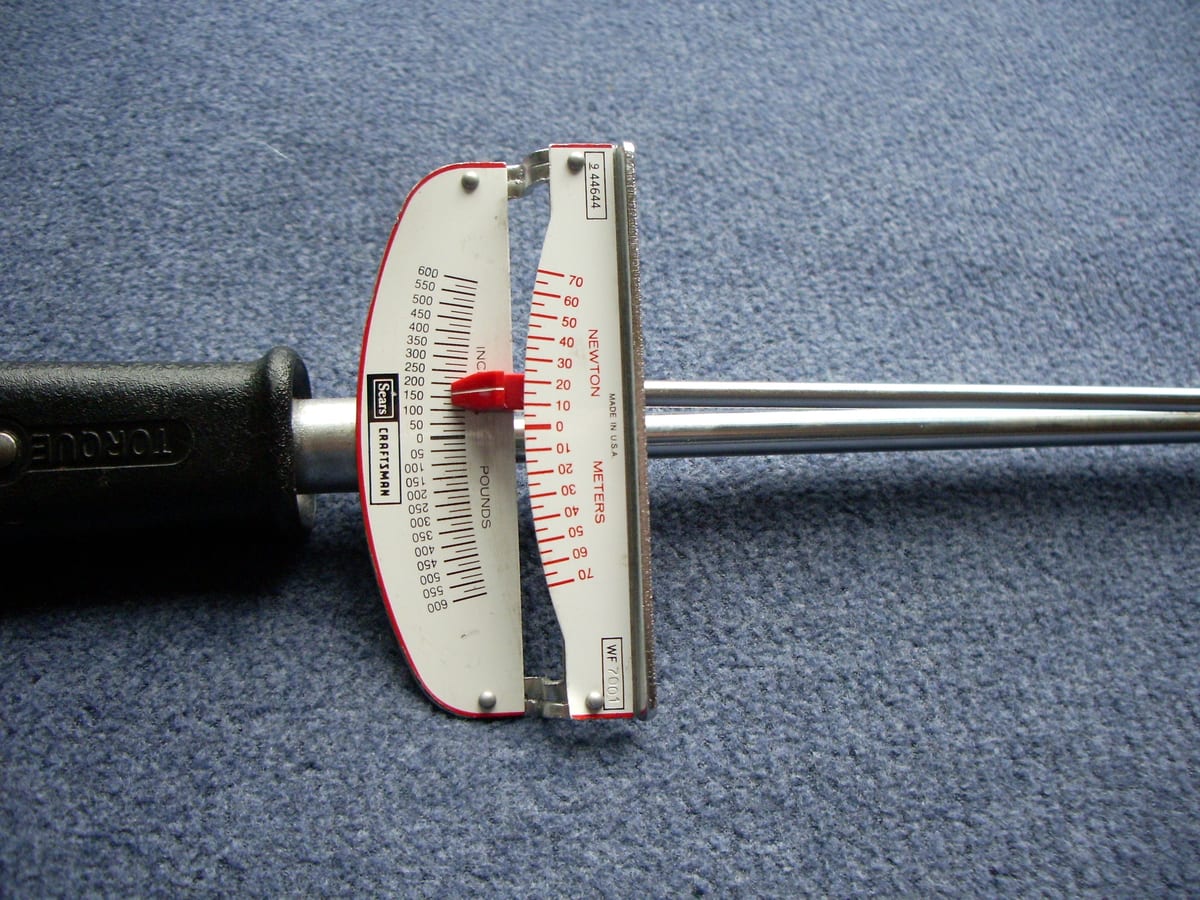
A beam wrench has no mechanism to fool — the main beam flexes, the pointer stays straight, and the scale tells you the torque live. Two rules: put your eye directly over the pointer (reading at an angle adds parallax error), and let the pivoting handle float — it exists to keep your force centered on the calibrated point. Beam wrenches rarely go out of calibration; they just get bent by abuse. If the pointer doesn’t rest on zero, re-zero it by bending the pointer arm gently — not the beam.
Split beam — the one you don’t wind down
A split-beam wrench clicks like a micrometer wrench but holds its setting somewhere completely different, and that one difference drives everything people like about it. There is no coil spring squeezed up behind the handle. Instead a cam and follower ride where the beam splits in two, and the adjuster simply slides that trip point along the beam. Nothing is stored under compression — which is why you set one with fingertip pressure, and why you can put it away at whatever setting you were using instead of winding it back every time.
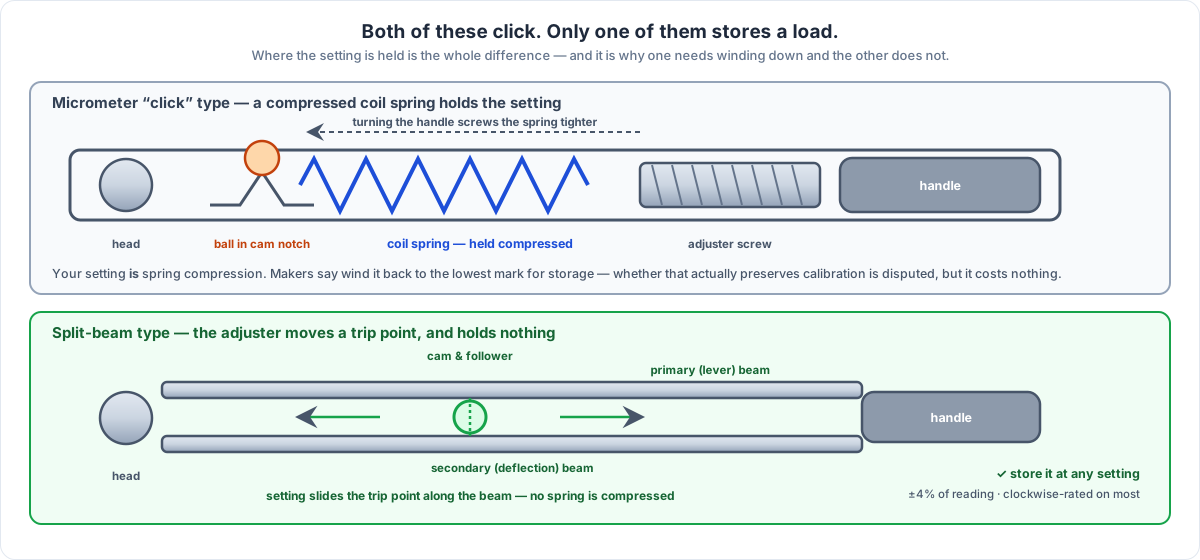
The good ones hold about ±4% of reading from 20% of scale upward — the same ballpark as a quality clicker, so you are buying the handling and the storage habit, not extra accuracy. Two things to know before you spend: most are rated for clockwise use only, and they are longer and heavier than an equivalent micrometer wrench. They are also a specialty purchase rather than a hardware-store one, with essentially two names in the game. For a wrench that gets picked up every day, not having to reset it is a real ergonomic win. For a wrench used twice a year, it is not worth the premium.
Digital type
- Check the units before anything else. Most digitals do ft-lb, in-lb and Nm. Ft-lb vs in-lb is a 12× error — the classic way to snap a valve-cover bolt.
- Pull slow and read the peak. Most units beep and hold the maximum — a fast jerk still overshoots before the beep reaches your ears.
- Use angle mode for torque-to-yield bolts. Head bolts and many suspension bolts are “torque + degrees” — a digital wrench with an angle function replaces the separate angle gauge.

Dial type — the one that shows you the curve
A dial wrench flexes a calibrated torsion bar and gears that deflection into a needle sweeping a round gauge. You watch torque build in real time rather than waiting for a signal at the end, and most carry a second memory needle that gets pushed along and stays at the peak — so you can torque a fastener you cannot see, then bring the gauge into the light and read what it actually got. Good ones are accurate to around ±2% of reading, tighter than a typical clicker, which is why they turn up as calibration references, on production QA benches, and in aerospace work.
The reason almost nobody owns one in a home garage is simple: you have to be able to see the dial while you pull. That rules it out for exactly the jobs where a click wrench earns its keep — blind bolts, wheel wells, anything overhead. They also cost more, and the gauge internals do not enjoy being dropped.
Never do these
- Never break bolts loose with it. That hammering load wrecks the clicker’s cam mechanism and its calibration. Breaker bars are cheap; recalibration isn’t.
- Never trust the bottom of the scale. A wrench is at its worst near the bottom of its range, and the old rule of thumb — ignore the first 20% — is a good habit even though it comes from a calibration method the standard has since moved on from. If your specs keep landing down there, you own the wrong wrench for the job.
- Back a clicker off before you put it away. Every maker tells you to store it at the lowest scale setting — and not below it, since forcing past the bottom stop unloads the spring stack completely and hurts it the other way. Whether a compressed spring really loses calibration in a drawer is genuinely disputed, and testing suggests the drift is milder than the folklore claims. But winding it down costs three seconds, so there is nothing to weigh up.
Extensions and adapters: when the number changes
One question decides whether you need to do any maths: does the adapter move the fastener off the wrench’s line of rotation? A straight in-line extension does not — the socket still turns on the same axis as the drive square, the lever arm is untouched, and you dial in the spec exactly as printed. Stacking a foot of extensions changes nothing. The widespread belief that it does is simply wrong.
A crowfoot or an offset adapter is a different animal. It parks the fastener further out along the handle’s line, so the fastener now turns on an arm of L + E instead of L, and the wrench under-reports what the bolt is actually receiving. Correct it with:
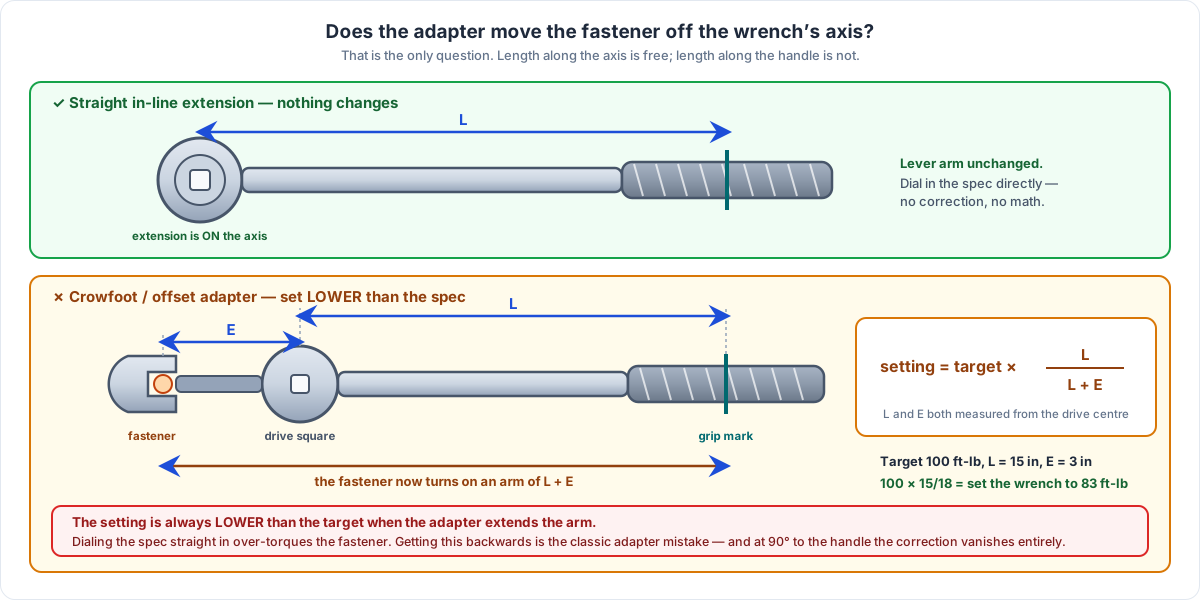
Measure both lengths from the centre of the drive square — L out to the grip mark, E out to the middle of the crowfoot’s jaws. That is the same grip mark the wrench’s own calibration assumes, which is why it is worth knowing where yours is. One shortcut: turn the crowfoot to 90° from the handle and the added length stops extending the lever arm, so the correction disappears and you set the spec directly. It works, but you have to hold that 90° through the whole pull — drift off it mid-sweep and you have quietly reintroduced the error you were avoiding.
Two myths worth killing
“Click it twice to be sure.” The second pull doesn’t verify anything — the fastener is already at spec, so the wrench rides through the click and adds torque. One slow pull is the verification.
“My impact gun has torque settings.” Those dial positions are power stages, not calibrated torque. Run fasteners down with the gun if you like — then the final pass is always the torque wrench. (Lug nuts especially: gun-tight is how studs stretch and rotors warp.)
Most of your torque never reaches the bolt
This is the part that reframes everything else. Of the torque you apply, only about 10% actually stretches the bolt and creates clamp load. The rest is eaten by friction — roughly half under the bolt head and the other half in the threads. Torque is not a measurement of clamping force; it is a rough proxy for it, and the proxy drifts with every change in thread condition, plating and surface finish. Preload scatter of ±30% is normal even when you torque perfectly.
It also explains why critical joints moved away from torque alone. Once a bolt reaches yield the torque reading flattens out and tells you almost nothing, while angle tracks actual stretch directly — which is the whole reason head bolts are specified as “torque to X, then turn Y degrees.”
Calibration: when and how often
Industry guidance is a check every 12 months or ~5,000 cycles, whichever comes first — and immediately after a drop onto concrete. A healthy clicker holds about ±4% clockwise (ISO 6789 / ASME B107.14 territory). If a calibration certificate matters less to you than a sanity check: a bathroom scale, a vise and the wrench’s lever-arm math will expose a wrench that’s lying by 20%.
Some links below are Amazon affiliate links — as an Amazon Associate we may earn a small commission at no extra cost to you.
CRAFTSMAN 3/8” Drive Torque Wrench (CMMT99433)
A mid-range 3/8” clicker puts spark plugs, drain plugs, brackets and brake hardware in the middle of its scale — exactly where the 20% rule wants them. Pair with a 1/2” wrench for lug nuts and suspension.

Which wrench for which job
| Type | How you read it | Typical accuracy | Best for | Storage |
|---|---|---|---|---|
| Click / micrometer | Feel and hear one click at the set value | ~±4% | Almost everything. Blind and overhead bolts, because it needs no line of sight | Wind back to the lowest mark |
| Split beam | Same click, no compressed spring | ~±4% | Daily professional use. Mostly clockwise-rated | Leave it set |
| Beam | Watch a pointer against a scale | Good, and stable for years | Cheap, honest backup. Checking a suspect clicker | Nothing to do |
| Dial | Needle on a gauge, plus a peak-hold needle | ~±2% | Reference and audit work, where you want the whole curve | Nothing to do — but don’t drop it |
| Digital | Live display, beeps and holds the peak | Varies by tool | Torque-angle work, unit switching, logging | Take the batteries out |
Drive size matters more than most people expect, and it comes straight back to the 20% rule: pick the wrench whose range puts your specs in the middle of the scale, not at the bottom. In practice that means most people need two, not one. For specs written in inch-pounds, this guide shows when you need a 1/4” inch-pound wrench and why range matters.
The links below are Amazon affiliate links — as an Amazon Associate we may earn a small commission at no extra cost to you.
- 1/2” drive, for lug nuts and suspension. Anything from roughly 80 to 150 ft-lb lives here. A 1/2” click wrench is the one to buy first if you only buy one.
- 3/8” drive, for the bulk of engine-bay work. Spark plugs, brackets, brake hardware, drain plugs — a 10–80 ft-lb 3/8” wrench puts all of it mid-scale.
- 1/4” drive in inch-pounds, for small fasteners. Valve covers, sensors, interior trim and plastics are specified in in-lb, and a ft-lb wrench cannot resolve them. A 20–200 in-lb wrench is what stops you snapping a valve-cover bolt.
- An angle gauge, if you touch head bolts. Torque-to-yield specs finish in degrees, not ft-lb. A torque angle gauge does that pass unless your digital wrench has an angle mode.
Frequently asked questions
Can I use a torque wrench to loosen bolts?
To gently back off a fastener within its rated range, most manufacturers allow it — but never to break a stuck bolt loose. That shock load is what ruins the mechanism. Use a breaker bar.
Should I click it twice to double-check?
No. The second pull rides through the click and adds torque past spec. One slow pull is the measurement.
What’s the difference between ft-lb and in-lb?
1 ft-lb = 12 in-lb. Small fasteners (valve covers, sensors, interior hardware) are usually specified in in-lb — reading an in-lb spec on a ft-lb wrench over-torques by 12×.
How should I store a click-type torque wrench?
Backed off to the lowest setting on the scale — not past it to zero — in its case, not hanging wound-up on a pegboard.
Do I really need a torque wrench for lug nuts?
Yes. Gun-tight lug nuts stretch studs and warp rotors; loose ones back off. Look up your exact spec by year, make and model — passenger cars run roughly 80–150 ft-lb.
Keep going
Bottom line: a torque wrench only measures what your technique lets it measure. Hand on the mark, 90°, one slow pull, stop at the click — and store it backed off. The number to pull to is in our database for 100,000+ fasteners by year, make and model.

Video plays from YouTube when clicked. Always confirm torque values against your service manual.